Ultralight Adventures III: The workshop

Hello!  I’m back.  I’ve been working an awful lot so…………..

New years resolution: Post more.

maybe if i say it enough times it will come true

But yes.  So I anticipated just tugging the airplane outside when I wanted to work on it. Simple, right?

One word. COLD.

It’s very windy and cold here and I hate it.  So my landlord graciously gave me a garage bay to work in for the winter.  I have to be out of it by June.  THE RACE BEGINS.

Here is the final product!

2018-12-31 01.42.55

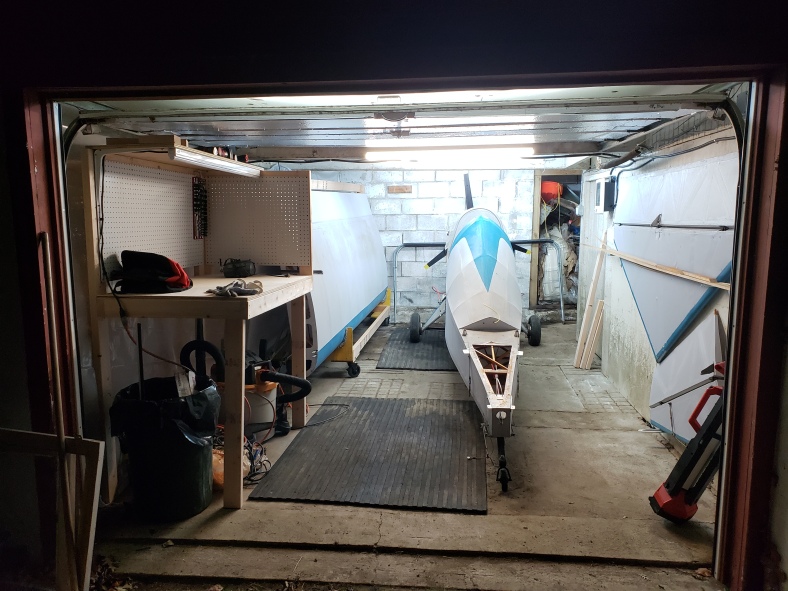
Pretty nifty, huh?  I added a lot and cleaned a lot!

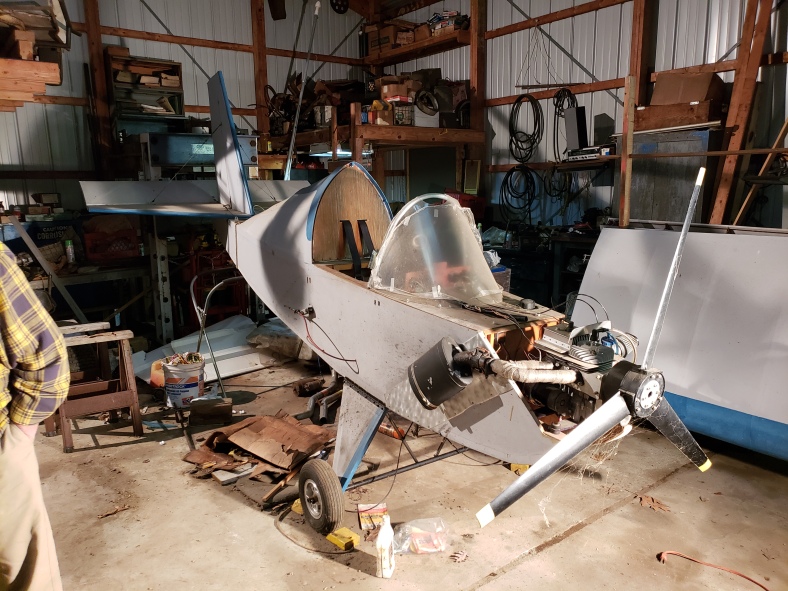
Keep in mind, this is what it used to look like:

2018-11-04 19.26.14

Yeah, pretty big difference.

So the main things I did were to add five 48″ LED bars to the ceiling + 1 on the workbench, wire up two outlet boxes to provide useful tool power around the space, and most importantly, insulate the door, divide my bay from the other bay with thick plastic drop.. cloth.. stuff, and add two 2000W electric heaters!  Gloves suck to do work in and I hate cold so here we are.  I also got rid of a very, very old dead fridge that was eating up a lot of space.  Now I can push the wing cart back a couple feet, allowing a good sized work bench.

There was already switched light power in the garage as well as a high amperage 240V plug, so that was the heaters and lights taken care of.  To power the rest of the outlets, a normal 12ga armored cable was ran from the workshop (further to the right of the garage) electrical panel to the garage.  … That’s pretty much it.  It’s outlets.  Woo.

The heaters were nice.  My landlord again graciously lended me a smart thermostat that I can control from my phone so when I plan on doing work in there, I can fire it up an hour before and warm the place up! It manages to hit 60F pretty easily and hold it there, and that’s perfect for me.  Hoodie temps, but no gloves required.  70F is a bit much, and the heaters never turn off.


Opinion? Love the heaters.  The heater in the workshop is a PTC style heater with a large thermal mass in it, which kinda stinks to be honest because it means that the heater ALWAYS needs power because the fans need to cool the element down. If you just cut power to the whole thing when you are done heating, the inner hot core heatsoaks to the outer casing and the thing ROASTS and gets super dangerously hot and the plastic parts on and near it start to get a bit soft.  Normally the fan is controlled by a thermal switch that turns it on after the element gets warm and then holds it on for a minute after it shuts down to cool it off safely.  But this is annoying to add a smart thermostat to.

The nice part about these cheaper cadet ones is that they have what is essentially a hair dryer element inside, so when you cut power, bam, its all good.  Easy to control externally.

I can’t believe I just wrote that much about wall heaters…

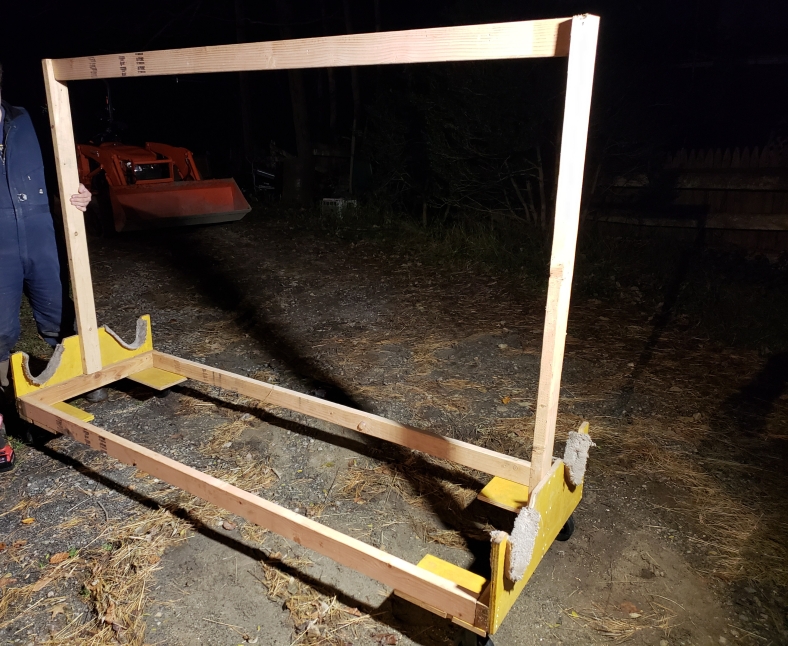
Anyway!  So now we have power, heat.. Workbench time! I put way too much stuff down and it just sits on the plane, which is fine until I bump it and then everything topples over.  So I designed this quick bench to use some scrap cuts of 3/4″ plywood that I had laying around from when I made my desk in my living room.

benchoverview2

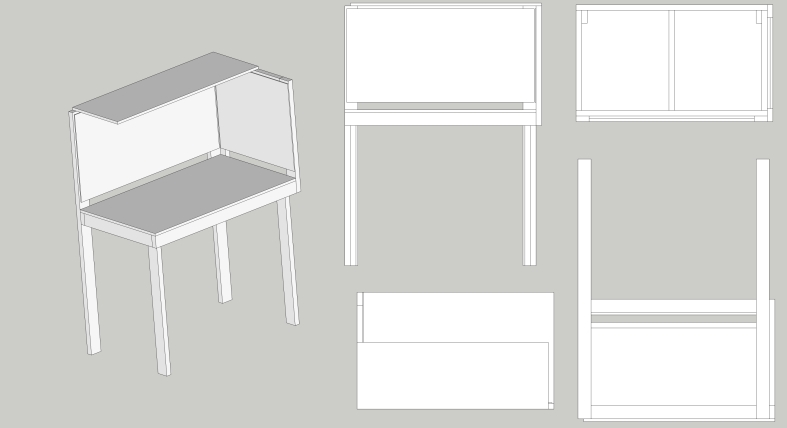
After that, I went to assemble it, aaaaaand…

2018-12-30 21.38.15

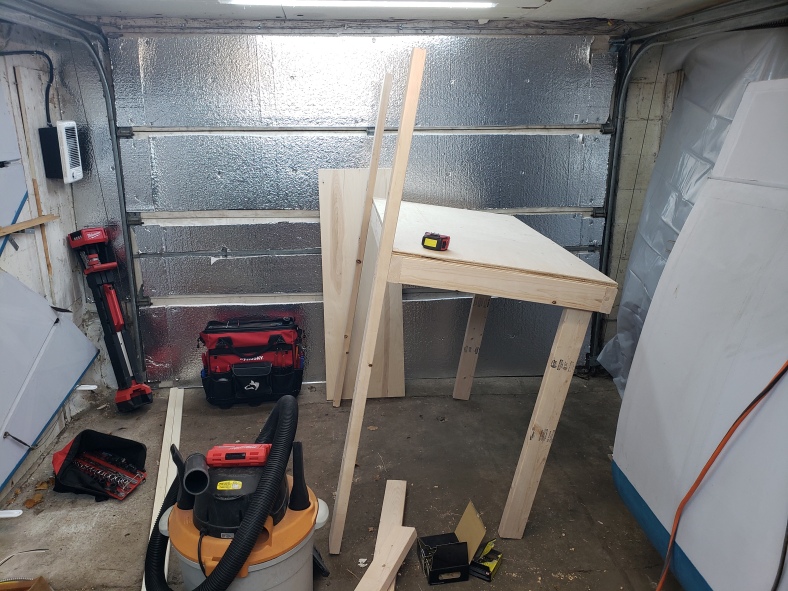
Oh dear. I hope this isn’t going to reflect my level of craftsmanship for the rest of this project, or the flying coffin warnings I constantly get from everyone might turn out to be correct…

One realizing I lined the marks up with the bottom of the bench-top instead of the top of it and re-doing it later….

2019-01-03 20.53.10

We have a nice complete bench!  Got a cheap power strip.. thing from Amazon, clipped one of my several extra M12 chargers onto the side, mounted a socket holder because why not..  Cheap amazon chair.. Amazon is going to be a common theme.

Finally, my girlfriend helped me clean out the whole place and vacuum it a bit and then drag in some unclean but now somewhat clean stall mats.  Now its quite a nice place!

2018-12-31 01.24.12

Doing the foam insulation on the doors was a bit of a hack job but.. it worked.  The room went from never being able to crest 50F to easily hitting 60F and the heaters can actually turn on and off at roughly 50% duty cycle.  Nice!

That’s honestly it for now.  Now that I finally have a nice warm clean place to work, I have no excuse but to finally work on the airplane.  First things first, I’ll be tearing it down and pulling lots of parts out of it, to start remaking them to be tall person friendly.

Stay tuned!

Ultralight Adventures II: The Acquiring

My baby is here.  She requires a lot of little things, so.. prepare for that.

I am very excited about this airplane, it’s been a very long dream of mine to fly, and well, here we are. The story of this airplane is one that is very interesting, because as far as I can tell, its as old or older then me, and has never flown!  It was made by a retired aircraft mechanic as a hobby project, but before he finished it, he had some heart complications, and decided to stop working on it.  It was very close to flying, was stuck in a big shed building, and left to collect dust.

Now, I’m not one to turn down a very good price for an engine, let alone one that comes with a free airplane with 300 hours of labor already completed.  That means I fly in 2019, not 2029, given the pace of my projects and blogging.

2018-11-03 20.57.22

The first part of the adventure was getting the dang thing home.  This was not as easy as I anticipated.  It turns out that despite a 16ft utility trailer seeming absolutely enormous, when you have a large and very fragile aircraft with parts that don’t like to sit or rub on each other, you use that space pretty fast………

For anyone who finds themselves needing to do this, I found that the winning arrangement (for a minimax anyway) is to angle the plane slightly sideways and put the tail wheel up on a concrete block. Then you stick both wings under the side that has more room (from where its turned sideways slightly) and place said wings curved sides towards each other. There are strut mounts that would dig in and otherwise ruin the wings if it was the other way around.  After you do that, liberally apply many moving blankets and hope none blow off (they did) and then even more liberally apply tons of tie down string, hoping that doesn’t loosen up (it did).

Remember kids, use actual tie down string and not just what you had laying around, especially if what you had laying around is pull cord for pulling wire through electrical conduit and is literally designed to be as slippery as possible.  Hindsight is 20/20.  Thank you very much Nick for helping me do this and bringing your truck and trailer.

2018-11-04 14.51.472018-11-04 14.52.02

And here we go! An airplane! Sans ailerons because I was lazy.  In retrospect they were actually really easy to attach and I should have just put them on.  Oh well ¯\_(ツ)_/¯

While horsing around with my friend and landlord, we discovered that the battery, despite not being charged for years, still had enough power to bump over the engine.  A dash of 2 stroke premix and some ignition-off spinning to lube everything up, and..

Friend filming, me being cold behind a giant fan on a 43 degree day.

Engine runs nice!  Now to tear it all down to inspect everything.. well, not now, but eventually.  Once I cart it all upstairs.

After having our fun, we made a stand to stick the wings on (with ailerons) so it could be safely tucked into the garage.

2018-11-04 18.32.192018-11-04 19.26.14

Now, what to do.  Well, a deep clean first, when it STOPS RAINING.

After that, this is my fast and (very) loose checklist.  One you’d find sharpied badly onto a piece of torn cardboard and duct taped to the wall.

  • Preliminary inspection (I have to trust all the glued bits of popsicle sticks before I want to fly my butt around in it.)
  • DIY Glass cockpit display (because I want it)
  • Tall person mods (it is not.. able to fit me right now)
  • Engine work (actual 2 stroke exhaust, better sensors, maybe new mounts?)
  • Misc repairs to structure (trailing edges of wings have separated slightly)
  • Misc repairs to fabric skin (some tears here and there)
  • New paint (because right now, its kind of ass..)

To elaborate on some of these points:

Inspection is going to take a while, and I’ve already found some damage.  Mainly in the trailing edge of the wings, in the cavity where the ailerons attach.  The issue is that the tension of the dacron wing fabric tugs back on the wood they are adheared to, which due to the small surface area of the glue join between the trailing piece and the wing ribs, causes them to pop off.  This is bad.

Based on some forum talking, it appears to be a common issue with the old version of the mini-max (remember when I said this plane is older then me?)  I’ve been mulling over a few solutions, and one nice one was offered on the forums, which is to poke some strong thread through the fabric and around the trailing edge wood, and then around the wing rib, knot it all together, soak in glue to stiffen it up, and repeat.  I will post details when I get that far.

I am very excited about the DIY glass cockpit display.  I’m a sucker for that kind of needlessly complicated stuff, so here we go.  I am going for a raspberry PI based system, as well as a ridiculously bright 1000cd/m2 10.1″ IPS display I sourced from Alibaba.  I have no idea when it will get here and the sketchy Chinese tracking site seems a bit weird, but hey.  It’s by far the brightest HDMI display I could find, and cheap too! 60 bucks each for the display/HDMI driver, and 25 dollars shipping for 2pcs of them.  I spied kits of similar LCDs with driver boards at 1/3 the brightness, same resolution, for 140+!

Tall person mods are a must, and will likely be the first thing to happen because what mods have to be made and what ones do not will judge where everything else gets mounted and shuffled.

The main issue is …. I’m not sure what the deal is, but the part where the top deck juts out from the back of the cockpit really causes most of the issues.  I’m hoping that widening the hole and moving the seat support rails back, plus shifting the rudder pedals forward will fix my issues.

2018-11-04 20.15.29

Where the seat belts hang over is like a 4 inch… spot, and I can’t figure out any reason for it to be there other then to cause misery and pain.  It does not have any key structural members in it (as far as I can tell) and only has the seat frame on it.  The huge main support beam is behind it, flush with that back seat wall plate thing on the turtle deck.

Engine work is not as much as I thought it would be.  The main things are to clean out everything, replace spark plugs, wires, rewire the entire electrical system (because the one right now is sketchy as frig), make a cable or servo to adjust the carburetor mixture in flight, a new drive belt because this one is old, cooling ducts so the engine doesn’t overheat as right now the cooling fins sit directly behind the main propeller pulley and get no air at all, a new exhaust because the current one is not meant for a 2 stroke and so gives no back pressure pulse to supercharge the engine, and possibly new engine mounts.

…….Okay so that is a lot of work.  But I shall prevail at the speed of procrastination and bad weather.

Fabric repairs and new paint are pretty self explanatory. Some of the fabric has little tears on it, some old before my interaction, and some entirely my fault being boneheaded transporting it home.

I believe that covers everything.  First chance I get, I’ll be working on cutting the old seat frame out and starting to inspect the entire structure for damage, so I can truly find out what a piece of junk my beautiful plane I naively bought without looking at it too hard actually is.


Whoops, its been two years! Also I have an airplane now. A Mini-max!

Sooooo.  Sorry, zero readers who come here!  I will try to be more active now. But we’ll see. =)


I have not picked it up yet..  But soon!  This spring, ITman will be flying!

This is a Mini-Max 1030R  (I think)!  It is powered by a Kawasaki 440 2 Stroke, 2 Cylinder engine, feeding a 3 blade propeller through a reduction drive.

I have purchased it from a retired aircraft mechanic who never got a chance to fly it after  mostly building it.  So I aim to finish it up over the winter, get some lessons, and then be in the air by spring!  I will detail the build as it occurs here, as well as a few other places probably.

I have big plans for this baby!